Business Information Tabs Tasks
Tab-Listings-Forms Defaults-Tasks-Functions > Tab Tasks

Business Information Tab Tasks
In earlier sections we discussed enabling the tabs and settings and adding records and in some instances such as customers, suppliers, and inventory items updating the information.
Business Information Tabs include:
- Chart Of Accounts
- Customers
- Suppliers
- Inventory Items
- Non-Inventory Items
- Fixed Assets
The Business Information Tab Tasks are basically the same for all tabs included in this category and include:
Add New Record Button is a no brainer. It allows you to add new records. In our example it's a customer.
Edit Button allows you to revise, correct, and add additional information to a record.


Delete Button allows you to delete a record.
View Button displays Basic Customer Information along with the Options - Edit - Clone - Copy to - Print.
Edit Button in the View provides another option for Editing the record displayed. You can revise, correct, and add additional information to a record.
Clone Button allows you to create a new record similar to one that already exists. Cloning generates an exact duplicate of the record and allows you to make any necessary changes such as a customer's name when cloning a customer record. All standard and custom field contents will appear on a new transaction entry form exactly as they were for the parent record. The benefit? Saves you time.

Copy to Button is similar to creating a clone except it copies the record to a different Tab. Copying a customer record creates a record in the Supplier Tab while copying a supplier's record creates a record in the Customer tab.
Copy to Options include:
- New Supplier when copying a customer record
- New Customer when copying a supplier record
Print Button prints the basic information displayed on the screen.
Example of Customer Tab
We'll use the Customer tab as an example for explaining these tasks.
- Click the Customer Tab
- Customer Screen Listing displays
- Tab Tasks Options Include:
Add New Record - Customer
Edit
View
Add New Record
- Click the Customer Tab
- Customer Screen Listing Displays
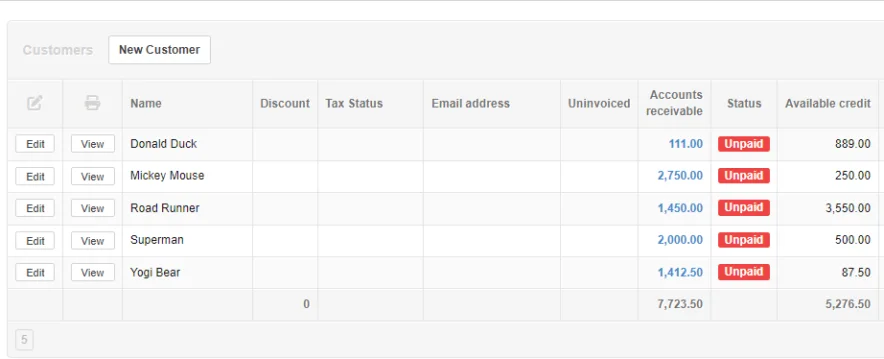
- Click Add New Customer Button
- Customer Form Displays
- Enter the information
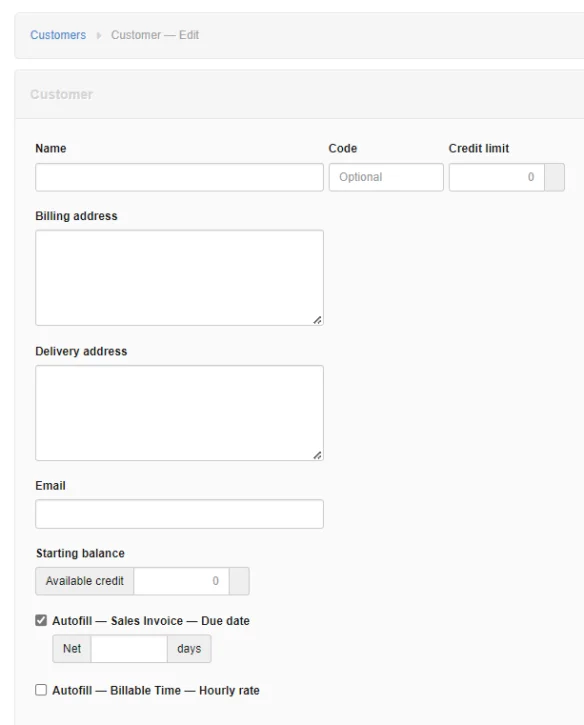
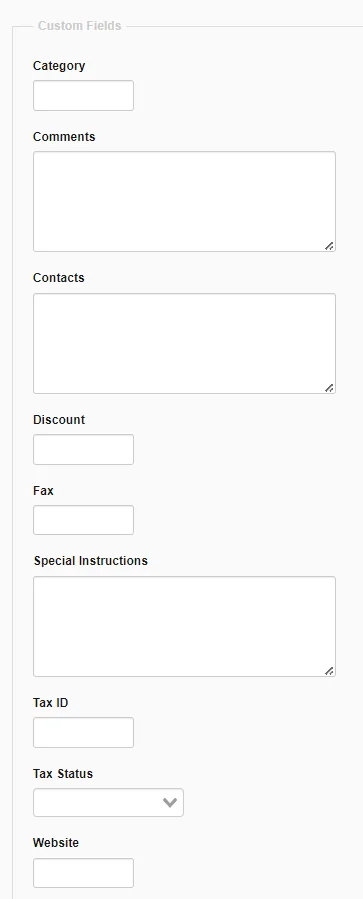
Click the Create Button

Editing a Customer
- Click the Customer Tab
- Customer Screen Listing Displays
- Click the Edit button for customer Road Runner

Customer Entry Form Displays for Road Runner
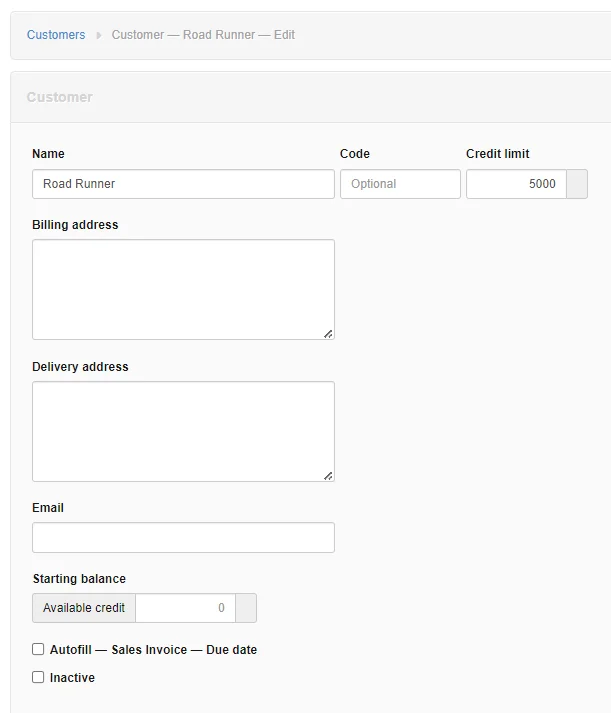
Make any necessary changes or additions. In our example we are updating the Billing Address that had not been entered.
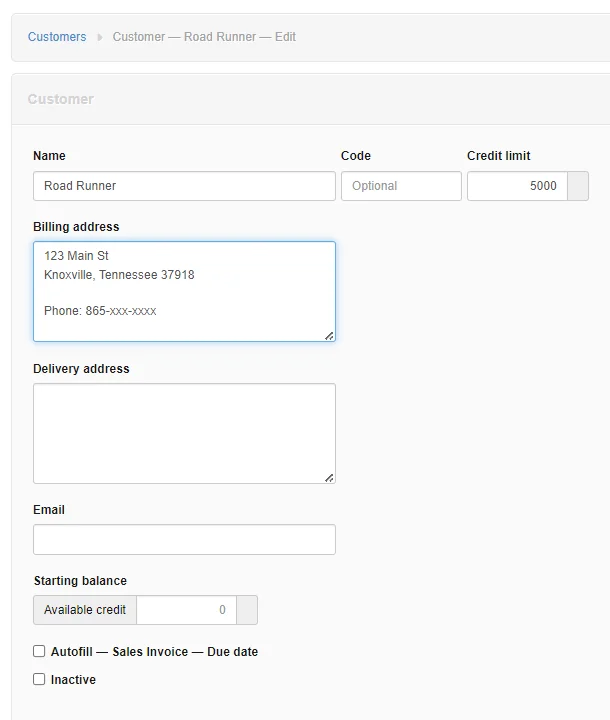
Click the Update Button to complete the Edit

Deleting a Customer
- Click the Customer Tab
- Customer Screen Listing Displays
- Click the Edit button for customer Road Runner
- Customer Form Displays

Customer Entry Form Displays for Road Runner

Click the Delete Button to complete the Delete

Note
Manager won't allow the user to delete any records that have any associated transactions. Use the delete task mainly for "housekeeping". In other words, getting rid of old customers you no longer do business with. The same "housekeeping" applies to old suppliers, unused accounts in the chart of accounts, inventory items, and other records.
Viewing a Customer
- Click the Customer Tab
- Customer Form Displays
- Click the View button for customer Road Runner

Basic Customer Information Appears along with the Options - Edit - Clone - Copy to - Print
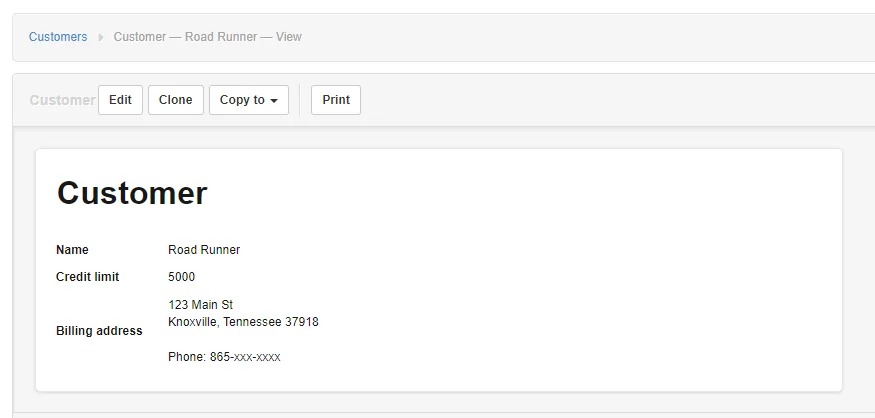
Edit Button in the View provides another option for Editing the record displayed. You can revise, correct, and add additional information to a record.
Clone Button allows you to create a new record similar to one that already exists. Cloning generates an exact duplicate of the record and allows you to make any necessary changes such as a customer's name when cloning a customer record. All standard and custom field contents will appear on a new transaction entry form exactly as they were for the parent record. The benefit? Saves you time.
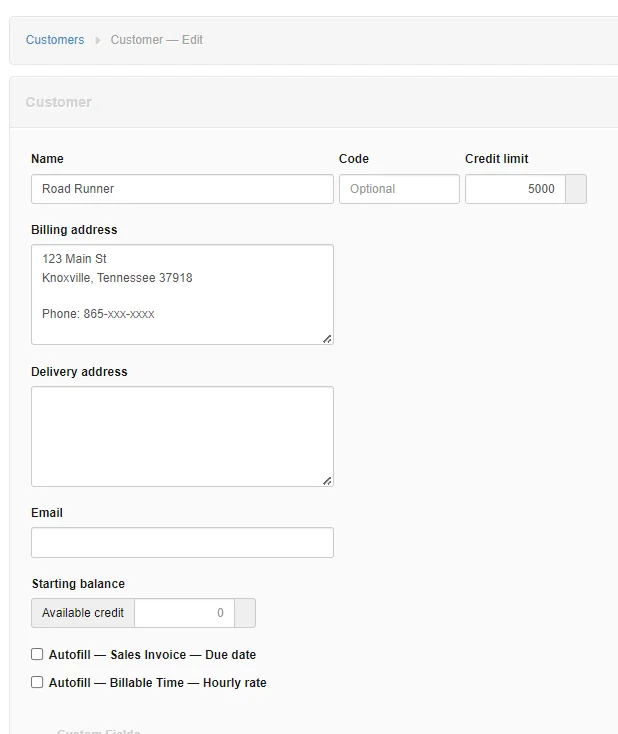
Copy to Button is similar to creating a clone except it copies the record to a different Tab. Copying a customer record creates a record in the Supplier Tab while copying a supplier's record creates a record in the Customer tab.
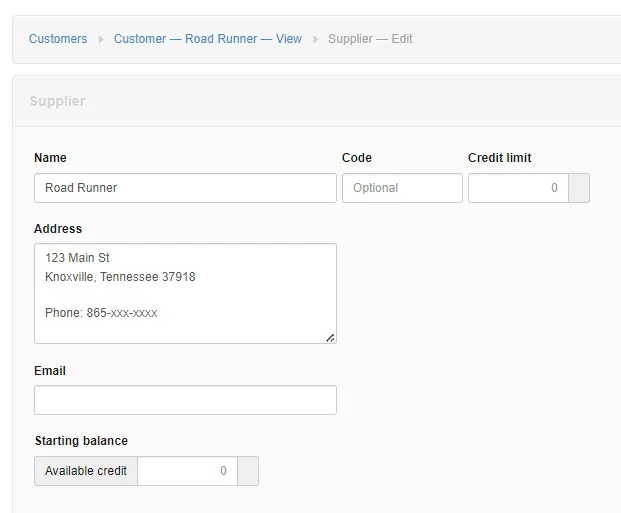
Print Button prints the basic information displayed on the screen.
